Let’s assume for some inexplicable reasons, we want to install the windows operating system on our machines. For this, first, we need to have a windows installer USB.
If you like to spend money, you can buy an original windows installer USB from here and skip the remaining post.
Otherwise,
You can create an installer USB by yourself by performing these steps on a windows machine.
But wait. The reason that we want to create a windows installer USB in the first place was, that we do not have a machine running windows. Like me, if you only have macOS machines then you can use the below 3 steps to create a windows installer USB.
1- Download windows ISO
You can download windows ISO for free from the Microsoft website.
1.1- Choose the windows edition as follows

1.2- Choose the language as English

1.3- Choose 64 bits version

1.4- Above step will download an ISO file in your download location. Double-click on the ISO file and it will be mounted as a volume.
2- Prepare the USB drive
Now, let’s prepare the USB drive to copy the content from this ISO.
2.1- Insert a USB drive of at least 8 GB capacity in your Mac.
2.2- Open the Disk Utility app on your Mac.
2.3- Click on the USB drive in the left column under External and click on Erase somewhere on the right top.

2.4- I used the Name: WIN-USB but you can choose any. However, The Format:must be MS-DOS (FAT), and Scheme: need to be Master Boot Record

3- Copy the ISO content to the USB
After the step-1 and 2. you should be able to see 2 extra mounted volumes under Locations in your Finder left nav. Same as the last 2 options in the below picture.

Now, all we need to do is copy all the content from the location named CC***_X64*** to the WIN-USB.
But there is one file sources/install.wim in our installer content, which is more than 4 GB. And the File format that we chose to format our USB only supports a maximum file size of 4GB. However, all the other files can be copied to a USB drive as is.
So
3.1- Select all the folders except the source folder from this CC***_X64** volume as below, and paste it into the WIN-USB volume.

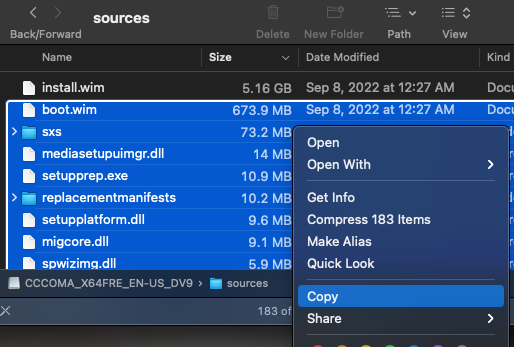
3.2- Create a folder name sources inside the USB drive and copy all the content of the sources folder from ISO into the sources folder in USB except the one file install.wim

To copy sources/install.wim to USB, we need to break the file into pieces smaller than 4GB. For this, we are going to use the wimlib utility. To install wimlib on the Mac, we will use Homebrew.
If you do not have homebrew on your mac my first question is why, But then my next statement is, you can easily install it with the below commands.
/bin/bash -c “$(curl -fsSL https://raw.githubusercontent.com/Homebrew/install/HEAD/install.sh)"
3.3- Assuming we have homebrew installed on Mac, we can install wimlib by the following command.[~ %]==> brew install wimlib
3.4- After wimlib is installed we can use the following command to split our install.wim file into smaller files and copy them to USB.
[~ %]==> wimlib-imagex split /Volumes/CCCOMA_X64FRE_EN-US_DV9/sources/install.wim /Volumes/WIN-USB/sources/install.swm 4000That's all, now you can eject this USB from MAC and use it to install windows on a PC.
Comments